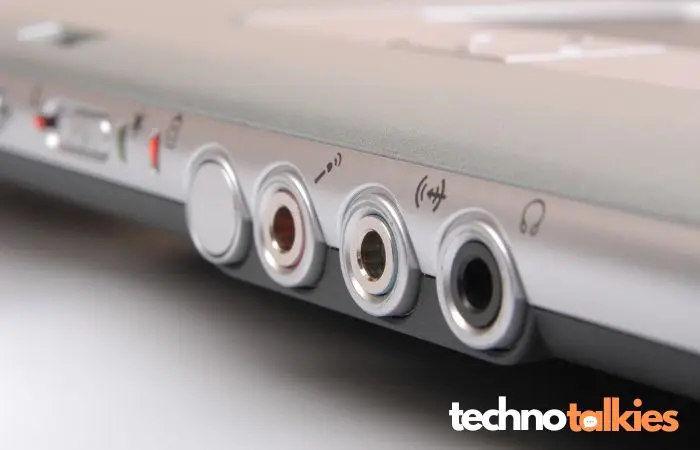
Is your laptop’s sound not working properly? You’re not alone. The audio driver conflicts issue is that it can leave your laptop without sound or sudden drops in volume. The good news is that these problems are usually fixable with some simple troubleshooting at home. In this guide, we’ll show you how to fix audio driver conflicts issue on your laptop step by step.
What Causes Audio Driver Conflicts?
Audio driver conflicts occur when your laptop’s sound driver is outdated, corrupted, or conflicting with other software. This can result from a variety of causes:
- Outdated drivers: Your audio driver may need an update.
- Windows updates: Sometimes, a recent update can cause compatibility issues.
- Multiple audio devices: Conflicts can occur if more than one audio device is trying to play sound.
- Corrupted driver files: Files can become corrupted over time, leading to sound issues.
If your laptop’s sound has suddenly stopped working, follow these steps to resolve the problem.
How to Fix Audio Driver Conflicts
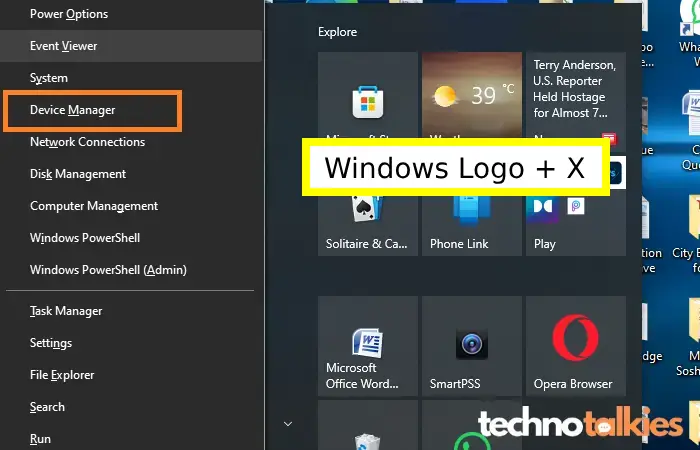
Step 1: Find Audio Drivers from Device Manager
- To open Device Manager, Press Windows Logo + X from your laptop keyboard and click on Device Manager.
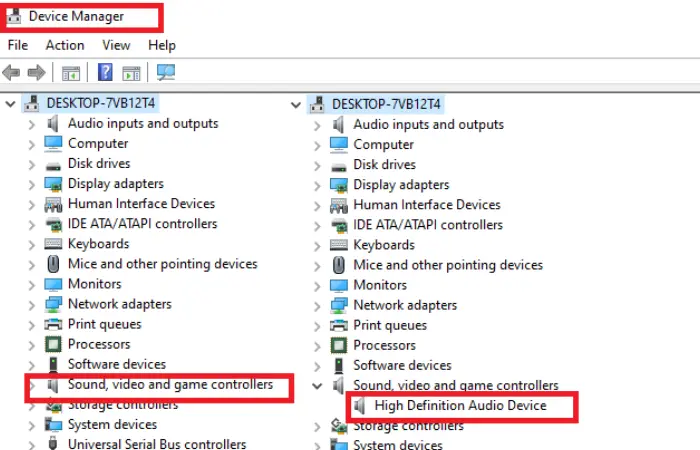
- In the Device Manager find the Sound, Video, and Game Controllers.
- Expand the option and you will find high-definition Audio driver.
You might also be interested in reading this related topic: How to solve “no sound” issues on your laptop
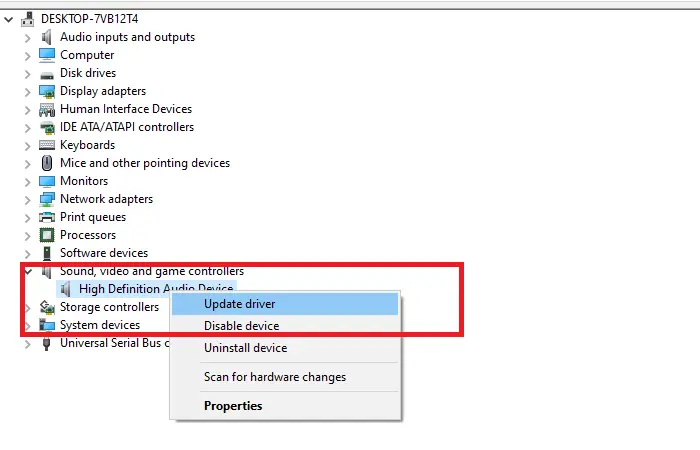
Step 2 : Update Audio Drivers to Fix Audio Driver Conflicts
- Right-click on your audio driver and click on Update Driver
- Click on Search automatically for drivers.
- Now this will automatically install the latest available audio driver for your laptop as well as remove the conflict driver.
You might also be interested in reading this related topic: How to solve your Laptop’s Microphone if it is not working
Step 3 : Restart your Laptop
Now you should see the updated Audio driver which best matches your laptop audio device.
If the issue is not fixed or if Microsoft’s pre-installed drivers are causing the issue,.
Follow Step 4 below:
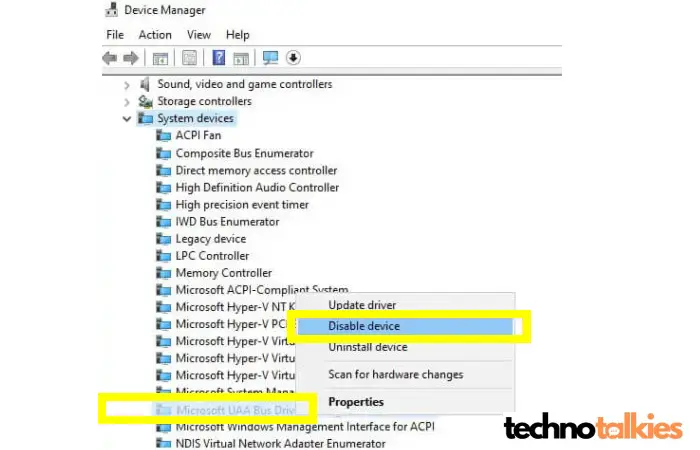
Disabling Microsoft UAA Bus Driver for High Definition Audio
- Back into Device Manager
- In the Device Manager, scroll down to System Devices.
- In the expanded list, you will find Microsoft UAA Bus Driver for High Definition Audio.
- To disable the driver, right-click on the Microsoft UAA Bus Driver and select Disable device.
Restart Your Laptop
After restarting, your audio issue will be fixed. If all the above steps fail to resolve the issue, you should consult with an expert for further troubleshooting.
Finnaly
Audio driver conflicts on a laptop can be frustrating, but they’re usually easy to fix with some basic troubleshooting, even at home. Whether you’re dealing with no sound or compatibility issues, updating or reinstalling your audio drivers is often the best solution. If the problem persists, consider reaching out to your laptop manufacturer for additional support or checking if there’s a hardware issue.
For more detailed guidance, check out Microsoft’s official audio troubleshooting guide.